
티스토리 뷰
이번에는 뷰페이지에서 많이 쓰이는 것 중에 하나인 Form 태그를 사용할 때
타임리프로 어떻게 표현하는지에 대해서 간략히 살펴보고자 한다.
예제를 위한 설명은 test6.html에서 폼태그와 input 박스를 통해 사용자가 정보를 입력하고 전송하면
test6_1.html에서 결과 목록을 보여주는 것을 구현한다.
그럼 먼저 컨트롤러에 test6과 test6_1에 요청에 대한 뷰페이지 매핑 처리를 구현해본다.
|
1
2
3
4
5
6
7
8
9
10
11
12
13
14
15
16
17
18
19
20
21
22
23
24
25
26
27
28
29
30
31
32
33
34
35
36
37
38
39
40
|
package com.joyhong.controller;
import org.slf4j.Logger;
import org.slf4j.LoggerFactory;
import org.springframework.stereotype.Controller;
import com.joyhong.domain.Book;
import com.joyhong.service.BookService;
@Controller
public class TestController2 {
private Logger logger = LoggerFactory.getLogger(TestController.class);
@Autowired
private BookService bookService;
public String test6(Model model, Book book) {
return "test/test6";
}
public String test6_1(HttpServletRequest request, Model model, Book book) {
bookService.createBook(book);
model.addAttribute("bookMap", bookService.readBookAll());
return "test/test6_1";
}
}
|
test6에 대한 요청이 들어오면 단순히 test/test6 으로 매핑해주면 되고
test6_1에 대한 요청이 들어오면
첫째로 요청과 함께 들어온 Book 객체를 bookService 를 사용하여 서비스 로직에 보내 값을 입력하도록 처리하는 것과 둘째로 전체 책 목록을 불러와 bookMap 이라는 이름으로 모델 객체에 담아 test/test6_1 뷰로 매핑시키도록 하였다.
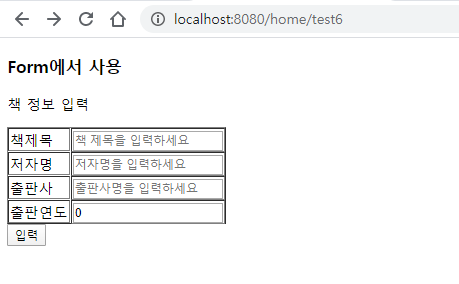
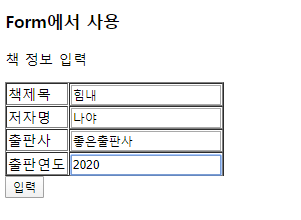
이제 test6.html을 사용자가 값을 입력하도록 구성해야 하는데 코드는 아래와 같다.
|
1
2
3
4
5
6
7
8
9
10
11
12
13
14
15
16
17
18
19
20
21
22
23
24
25
26
27
28
29
30
31
32
33
34
35
36
37
38
39
40
41
42
|
<!DOCTYPE html>
<head>
<meta charset="UTF-8">
<title>Insert title here</title>
</head>
<body>
<div>
<h3>Form에서 사용</h3>
<p>책 정보 입력</p>
<form th:action="@{/test6_1}" th:object="${book}" method="post">
<table border=1>
<tr>
<td>책제목</td>
<td>
<input type="text" th:field="*{title}" placeholder="책 제목을 입력하세요">
</td>
</tr>
<tr>
<td>저자명</td>
<td>
<input type="text" th:field="*{creator}" placeholder="저자명을 입력하세요">
</td>
</tr>
<tr>
<td>출판사</td>
<td>
<input type="text" id="publisher" name="publisher" placeholder="출판사명을 입력하세요">
</td>
</tr>
<tr>
<td>출판연도</td>
<td>
<input type="text" th:field="*{publishedYear}" value="">
</td>
</tr>
</table>
<button type="submit" >입력</button>
</form>
</div>
</body>
</html>
|
test6.html에서 중요한 것은 크게 두가지인데 form 태그에서 사용하는 속성과 input 태그에서 사용하는 속성이다.
form 태그에서 사용하는 속성은 action과 object을 잘 정의해야 한다.
action은 form태그에서 사용하는 action으로 타임리프 문법을 사용할 때는 th:action을 사용한다. 이럴 경우는 @{ } 을 통해 URL을 명시할 수 있다. thLaction=@{/test6_1} 을 사용함으로 context-path를 생략하고 바로 test6_1을 입력할 수 있게 된다. (context-path는 application.properties 에서 설정하였으며, https://joyhong.tistory.com/97 하단부에 설명을 한적이 있다.)
th:object는 폼에서 서버단으로 값을 넘길 때 object 에 지정한 객체에 값을 담아 넘겨줄수 있다.
이 예제에서는 Book 이라는 클래스에 해당한다. 이렇게만 지정하면 끝나는게 아니고 폼 태그 안에 input 박스나 다른 태그를 통해 Book 클래스 멤버변수에 해당하는 것들을 지정해 줘야 한다.
이 때 위 예제와 같이 th:field="*{변수명}" 과 같이 사용할 수 있고, id와 name을 하나씩 써주는 방식으로도 사용할 수 있다.
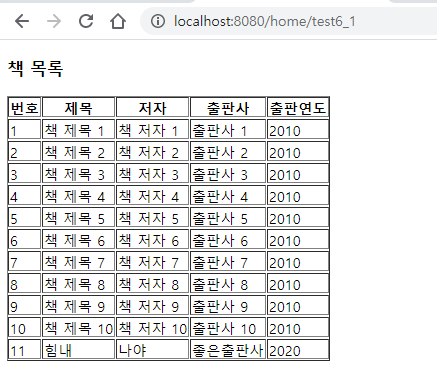
그럼 test6_1을 살펴보면 test6.html에서 입력한 값을 Book 객체에 담아 test6_1로 요청을 보내고, test6_1을 처리하도록 생성한 컨트롤러는 서비스로직으로 요청받은 값을 입력하도록 보낸뒤 전체 목록을 가져와 test6_1.html에서 보여지도록 한다. test6_1.html은 bookMap에 담겨있는 내용을 th:each로 반복하여 보여주도록 한다.
|
1
2
3
4
5
6
7
8
9
10
11
12
13
14
15
16
17
18
19
20
21
22
23
24
25
26
27
28
|
<!DOCTYPE html>
<head>
<meta charset="UTF-8">
<title>Insert title here</title>
</head>
<body>
<div>
<h3>책 목록</h3>
<table border=1>
<tr>
<th>번호</th>
<th>제목</th>
<th>저자</th>
<th>출판사</th>
<th>출판연도</th>
</tr>
<td th:text="${book.creator}"></td>
<td th:text="${book.publisher}"></td>
<td th:text="${book.publishedYear}"></td>
</tr>
</table>
</div>
</body>
</html>
|
여기서 새로운 구문 th:with를 사용하였다. th:with는 위 예제와 같이 entry.value와 같이 긴 내용을 book 이라고 짧게 지정할 수 있다. 즉 변수 바인딩과 같다고 생각하면 될 것 같다.
bookMap에 담긴 내용을 하나씩 꺼내 entry 에 할당하고, (entry는 HashMap이기 때문에 key와 value로 구성됨), entry의 value값을 book에 바인딩시켰다.
entry.value에는 Book 객체가 담겨있기 때문에 바인딩된 book을 통해 멤버변수에 접근이 가능하게 된다.
그럼 실행 결과는
다음으로는 AJAX를 사용하여 값을 가져와 원하는 곳에서 보여줄 때 사용할 수 있는 타임리프 fragments를 간단히 살펴볼 예정이다.
'SpringBoot+Thymeleaf' 카테고리의 다른 글
| Validation 체크하기 (0) | 2020.02.20 |
|---|---|
| AJAX로 화면 내용 바꾸기 (8) | 2020.02.18 |
| 타임리프로 뷰페이지 만들기 - 기본 문법 (0) | 2020.02.12 |
| Controller 생성하기 (0) | 2020.02.11 |
| 업무로직 만들기 (0) | 2020.02.10 |
- Total
- Today
- Yesterday
- cypher
- Knowledge Graph
- 그래프 데이터베이스
- 트리플 변환
- neosemantics
- rdfox
- stardog
- TDB
- Ontology
- sparql
- networkx
- Thymeleaf
- Linked Data
- Neo4j
- 지식 그래프
- 타임리프
- 온톨로지
- django
- 지식그래프
- TBC
- TopBraid Composer
- LOD
- RDF
- property graph
- 트리플
- pyvis
- 스프링부트
- 사이퍼
- RDF 변환
- 장고
| 일 | 월 | 화 | 수 | 목 | 금 | 토 |
|---|---|---|---|---|---|---|
| 1 | 2 | 3 | ||||
| 4 | 5 | 6 | 7 | 8 | 9 | 10 |
| 11 | 12 | 13 | 14 | 15 | 16 | 17 |
| 18 | 19 | 20 | 21 | 22 | 23 | 24 |
| 25 | 26 | 27 | 28 | 29 | 30 | 31 |